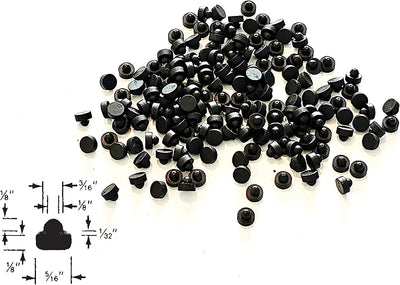
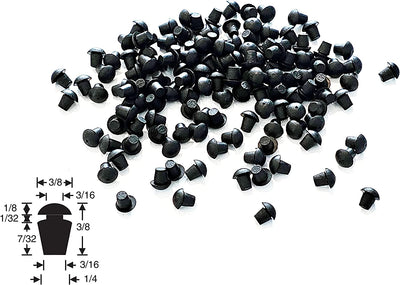
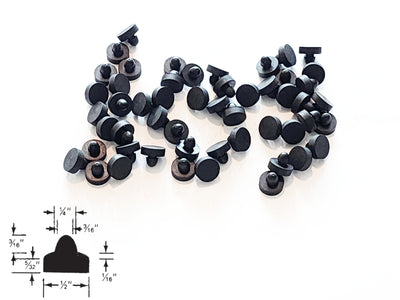
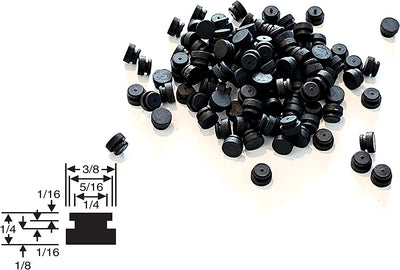
Quick answer: a push-in rubber bumper (also called a stem bumper or snap-in foot) has a rubber stem with a groove that snaps into a hole. To choose one, measure three things: the hole diameter, the thickness of the panel the hole is in, and the base size and height you need under the part. Match the hole and panel to the bumper's stem and groove, then pick the base. The table below lists every push-in bumper we stock by hole size.
Push-in bumpers are the feet on the bottom of slow cookers, griddles, blenders, bench grinders, computer cases and countless sheet-metal enclosures. They are also used as cabinet door bumpers and as simple hole plugs. Because they hold by friction in the hole, the fit is everything. A bumper with the wrong stem falls out, and one with the wrong groove never fully seats.
Anatomy of a push-in bumper
- Base (head): the visible foot that touches the table or the cabinet. Measured by diameter and height.
- Groove: the narrow neck under the base. Its width should match the thickness of the panel.
- Stem: the part that pushes through the hole. Its widest point is slightly bigger than the hole, which is what makes it snap and hold.
Product listings describe the stem by the hole it fits, which is the easiest number for you to measure.
How to measure for a push-in rubber bumper
- Hole diameter. Measure the empty hole with calipers or a drill bit gauge. If the old bumper is still in place, pull it out and measure the hole, not the stem. Stems are compressed in use and read smaller or larger depending on wear.
- Panel thickness. Measure the material right next to the hole. Thin sheet metal on appliances is often 1/32" to 1/16"; thicker plastic housings and cabinet walls can be 1/8" or more.
- Base diameter. A wider base spreads the weight and is more stable on smooth surfaces. Keep it narrow enough to clear nearby screws, vents or edges.
- Height. This is the clearance under the part. Match the original if you are replacing a set, so the appliance stays level.
Not sure about fractions? Our fraction / decimal / mm converter turns caliper readings into the nearest fraction.
Push-in rubber bumper size table
Sorted by the hole each bumper fits. All are sold individually, so you can order exactly the number of feet you need.
| Fits hole | Panel groove | Base diameter | Base shape | Base height | |
|---|---|---|---|---|---|
| 1/8" | 1/32" | 5/16" | Flat | 1/8" | View |
| 3/16" | 1/32" | 3/8" | Oval | 1/8" | View |
| 3/16" | 1/16" | 1/2" | Flat | 5/32" | View |
| 1/4" | 1/16" | 3/8" | Flat | 1/8" | View |
| 1/4" | 1/16" | 1/2" | Flat | 5/32" | View |
| 1/4" | 1/16" | 1/2" | Flat | 1/4" | View |
| 1/4" | 3/64" | 1/2" | Oval | 11/64" | View |
| 1/4" | 3/64" | 9/16" | Flat | 3/8" | View |
| 1/4" | 1/8" | 9/16" | Flat | 1/8" | View |
| 7/32" | 1/8" | 7/8" | Flat | 11/64" | View |
| 9/32" | 5/64" | 9/16" | Flat | 1/8" | View |
| 9/32" | 1/8" | 5/8" | Flat | 11/32" | View |
| 5/16" | 1/16" | 3/8" | Flat | 5/32" | View |
| 5/16" | 3/32" | 5/8" | Flat | 1/4" | View |
| 3/8" | 1/8" | 3/4" | Flat | 3/4" | View |
| 1/2" | 1/8" | 1" | Flat | 3/16" | View |
| 1/2" | 3/16" | 1" | Flat | 5/16" | View |
Browse them all in push-in rubber bumper feet, hole plugs and button grommets or the rubber stem bumpers collection.
How to choose between close sizes
- Several bumpers fit the same hole. For a 1/4" hole, for example, you can choose from flat or oval bases between 3/8" and 9/16" across and heights from 1/8" to 3/8". Choose by panel thickness first, then base size and height.
- Panel between two groove sizes? Choose the groove that is equal to or slightly wider than the panel. A groove narrower than the panel won't let the bumper seat.
- Hole between two sizes? Don't force a large stem into a small hole. It can tear the stem. If the hole is a little oversized, the bumper may push back out under load, so drill the hole to the listed size if you can.
- Oval vs flat base: both sit flat on the surface. The name describes the profile of the base. Match the original look if you're replacing one foot in a set.
How to install push-in bumpers
- Clean the hole and remove burrs or old rubber.
- Line up the stem with the hole and press firmly with your thumb until the panel edge clicks into the groove.
- For a stiff fit, dip the stem in soapy water first. It dries and the bumper grips.
- Check from the other side that the stem has passed fully through and the groove holds the panel on both faces.
- To remove one, pinch the stem from the inside and push it back through, or pull firmly from the base side.
Push-in, screw-on or adhesive?
Push-in bumpers are ideal when the part already has holes, or you can drill them, and you want a foot that won't slide off and doesn't need tools. If there is no hole and you can't drill, use self-adhesive feet. If the part is heavy or vibrates hard, a screw-on or recessed-washer foot holds more securely. Our comparison of screw-on vs push-in vs self-adhesive rubber feet goes through each option, and the rubber feet size chart covers every style.
FAQ
What is a rubber stem bumper?
Another name for a push-in bumper: a rubber foot with a stem that snaps into a hole. They are used on appliances, cabinets, enclosures and furniture.
What size push-in bumper fits a 1/4" hole?
We stock several. Choose by panel thickness (1/16", 3/64" or 1/8") and the base size and height you need. See the size table above.
Can a push-in bumper be used as a hole plug?
Yes. Many are listed as both bumper feet and hole plugs. For pipes, tubes and thicker material, see our guide to rubber plugs for holes and pipes.
Why does my push-in foot keep falling out?
The hole is usually a little oversized or worn, or the groove is too wide for the panel. Measure both and choose the size that matches. Replacing old, hardened feet also helps, because the rubber loses its grip as it ages.